Showing posts with label gift wrapping ideas. Show all posts

DIY paper flowers for your holiday packages

We have to admit there is something about a beautifully wrapped gift! It just makes us feel all warm and fuzzy inside! We love to adorn our gifts with something special to help create simple yet beautiful presentation. One of the easiest ways to do this is with paper flowers! They are so easy and can be created to compliment any wrapping paper or theme. We created these paper flowers with a holiday theme in mind.
By hot gluing them to a clothes pin you can reuse them over and over! We were so excited to have these featured on Studio DIY a couple of weeks ago! We hope you will give theem a try, happy wrapping!


Materials 
Card stock of your choice
Scissors
Hot glue
Mini ornaments
Eye lash yarn {Martha Stewart makes a great one}
Optional clothes pins


Take a piece of white paper and draw the shape of the petal you desire, it should be not bigger than 1 ½”. Be sure to have a rectangle shape at the bottom, this is important for creating the flower shape. Cut it out and use this as your pattern

Take your card stock and cut it into 2”x2” squares

Take your pattern and lay it on top of 2-3 squares of your cut out card stock and cut out, you can create 
2-3 petals at a time depending on the thickness of your card stock

You will need 7 petals for each flower 

Where you have your rectangle at the bottom cut a slit a few centimeters up
Cross one side of the slit paper over the other and hot glue it to hold it in place, this will give the petal shape and dimension

Cut a small 1” circle out of your card stock, or you can use a paper punch


Start to glue the bottoms of the flowers around the circumference of the circle. You will need about 4 petals. The last 3 petals can be stacked on top. As you glue the petals on fold them backward to give the flower some dimension

After your petals are all on securely, take one of your ornaments and some length of your eyelash yarn to create a center for the flower. Put a dab of hot glue on the bottom of your ornament and attached one end of the yarn


Wrap the yarn around until you reach the end and secure it again with another dab of hot glue.
Hot glue the entire bottom of the ornament and place it into the center of the flower

You can now add a clothes pin on the back of the flower, so that it can be attached to a gift or gift bag. You could even put a magnet on the back of the clothes pin! Since the flowers are being pinned onto a gift they can be reused as many times as you like! 


Glittered Ribbon Tassels

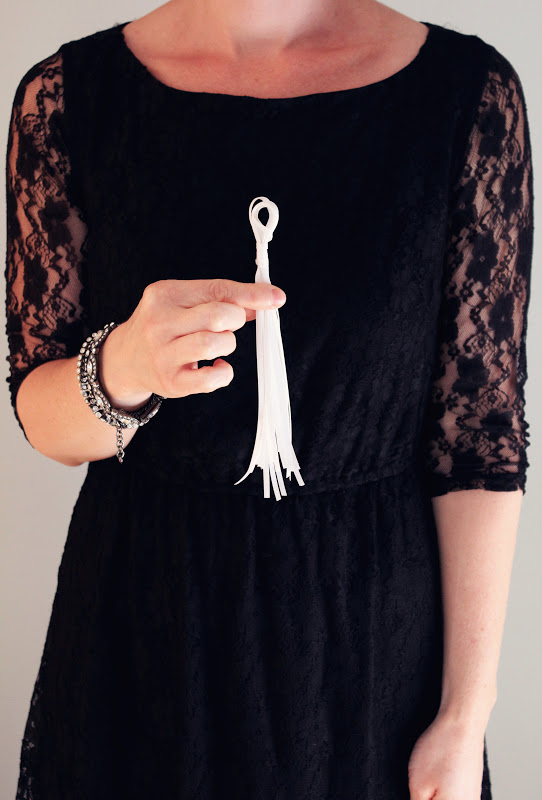
There is no doubt about it, tassels are 'hot' this year! We love them, they are festive and colorful and add a ton of style to any dessert table or party! Kellie has even spent many hours making them for her oldest daughter's birthday party last year! There are tons of different ways to make them and materials to make them with. We found it to be super easy to make them with thin satin ribbon, it literally takes mere minutes to make them this way! Of course, we had to a add a little glitter to the bottom of them to make them sparkle! But, we wanted to share with you this quick little tassel DIY and show you our new "tags" that we are offering in our shop! We have always been in love with pretty packaging, it really is all in the details! With the holidays coming up, this would be a great way to wrap some cheer into your packages! We also thought it would be a sweet way to wrap up a gift to give to a future bridesmaid! We tied the tassel onto the package with one of our new tags from our shop {which of course can be totally customized with color, font and wording}! They are an actual tag shape and have a glittered rim! Hope you will check them out!


Materials for Tassels:
Thin Satin Ribbon {Color or colors of your choice}
Hot Glue
Tack Glue
Paint Brush
Glitter 


You can create the tassels in any length you please. However for the box we used which was 6x6 we used 16 pieces of 14” think satin white ribbon.


1. Take the ribbons and lay them flat and even
2. Pick them up from the center and take one side and pull the 8 ribbons to make them a bit longer than the other 8
3. Put your pointer finger in the middle of the folded ribbons and take the side with 8 ribbons that is slightly longer and wrap once around the 8 ribbons that are shorter, to create a twist
4. This will create a loop at the top of the tassel
5. Take one ribbon {from either side} starting under the loop add a small dab of hot glue, attached the ribbon to the glue and wrap it around continuously, once wrapped add another dab of glue to secure it
6. Lay your tassel on a piece of paper and take your paint brush with some tack glue on it and swipe it across the bottom of the ribbons. {This does not have to be perfectly painted on} then add your glitter, sprinkling it over the ribbons evenly. After the glitter is sprinkled on pick up the tassel and shake off the excess.


Blogging tips