There are tons of great diy projects and one of them that we thought was super sweet were these diy cupcake liners! Have you ever wanted to find the perfect patterned cupcake liner to match your event, and just couldn't find them anywhere!?! Well, now you can make your own! We love the way these look and love the baker's twine...so cute! To get all the details & and free printables...check this out! You can even print the pattern and create liners with your own paper and pattern!
Showing posts with label cupcakes. Show all posts
DIY cupcake liners
Over the weekend we came across this blog called, funkytime! It is so colorful, creative and just plain FUN!
There are tons of great diy projects and one of them that we thought was super sweet were these diy cupcake liners! Have you ever wanted to find the perfect patterned cupcake liner to match your event, and just couldn't find them anywhere!?! Well, now you can make your own! We love the way these look and love the baker's twine...so cute! To get all the details & and free printables...check this out! You can even print the pattern and create liners with your own paper and pattern!
Sprinkled...
There is just something about sprinkles that makes us happy! Bright, colorful, festive and fun, they compliment sweet treats so perfectly! Hope you had a "happy weekend"!
Photos via: sweetapolita, pizzazzerie, raspberrie cupcakes, simplycharmingcharmlings.tumblr.com, lindseysauter.tumblr.com, thedecoratedcookie.com, meetspirations.tumblr.com, sprinklebakes.com, sweetapolita, sprinklebakes.com, pinterest.com, shewearsmanyhats.com, thegirlwhoateverything.com
Peach Cupcakes
We love baking and making sweet treats as gifts. Finding a gorgeous tray or cake stand and filling it with cookies or cupcakes and even a little cake is the perfect hostess gift! For Easter we wanted to try a delicious cupcake with a spring flair! We just love peach and thought we would make peach cupcakes with peach buttercream! The peach frosting was such a pretty tone and we love the look of grey and peach together. So we took grey and white striped straws {from Sweet Lulu} and made little ribbon flags from a cream colored ribbon and stuck them in the peach cupcakes for a special Easter treat!
Peach Cupcakes {adapted and revised from createdby-diane.com}
1/2 cup of softened unsalted butter
1 cup sugar
3 eggs
1 cup milk or peach juice
1 3/4 cup flour
1/4 cup cornstarch
1 teaspoon salt
1 teaspoon baking powder
1 teaspoon almond extract or vanilla
1 cup frozen peaches {defrosted and pureed}
beat butter and sugar
in separate bowl beat eggs, combine flour, cornstarch, baking powder and salt in another bowl
alternate eggs, flour mixture and milk {or peach juice} until combined then add peaches and combine
bake at 325 for about 16-18 minutes
makes 24 large cupcakes
Peach buttercream
1/2 cup butter
4 cups powdered sugar
1 teaspoon almond extract or vanilla
1/2-3/4 cup frozen peaches {defrosted and pureed}
*while pureeing your peaches in a food processor stream in about 2-3 tablespoons of milk
beat butter and sugar together, add flavoring and peach/milk mixture slowly until you get desired consistency for piping.
DIY tissue paper and fringe cupcake toppers
We are working on a really beautiful gold and creme themed baby shower that will take place this weekend. We are really excited to see how it all comes together. One of the diy projects we are working on is a creme colored tissue paper flower with a gold fringe center! We obviously love making paper flowers, and these are so easy to make and look so pretty on top of your cupcakes!
Materials:
tissue paper
gold fabric or ribbon
lollipop sticks
hot glue
scissors
We are topping mini cupcakes, so we cut mini circles our of our tissue paper, about 2". If you are making them for regular sized cupcakes you can cut your circles larger. Just layer your tissue paper and cut out circles...don't worry about them being perfect, the more imperfect you cut cut the more shapely the flower. You are going to use about 6 circles per cupcake topper. Punch a hole in the center of the layered tissue paper.
Cut a 1" strip of your gold ribbon or fabric {we found a spool of this thick gold ribbon in the dollar bin at Jo Anne Fabrics}. Roll the ribbon and hot glue the bottom of it together. Then just cut strips taking care you don't cut all the way to the bottom, you just want to create a fringed look.
Next add a dab of hot glue to the top of your lollipop stick and slide your 6 layers of tissue paper on. {Exactly like our diy ombre flower cupcake toppers} Then add another dab of glue in the center of your flower and add your fringe piece. Immediately close the top layer of tissue around the fringe so that it attaches. Then just continue to bunch your tissue paper layer by layer.
It's that simple! Hope you will try these, they would look beautiful in any color...especially with spring approaching!!


hole punch

Ghostly Cupcake Toppers
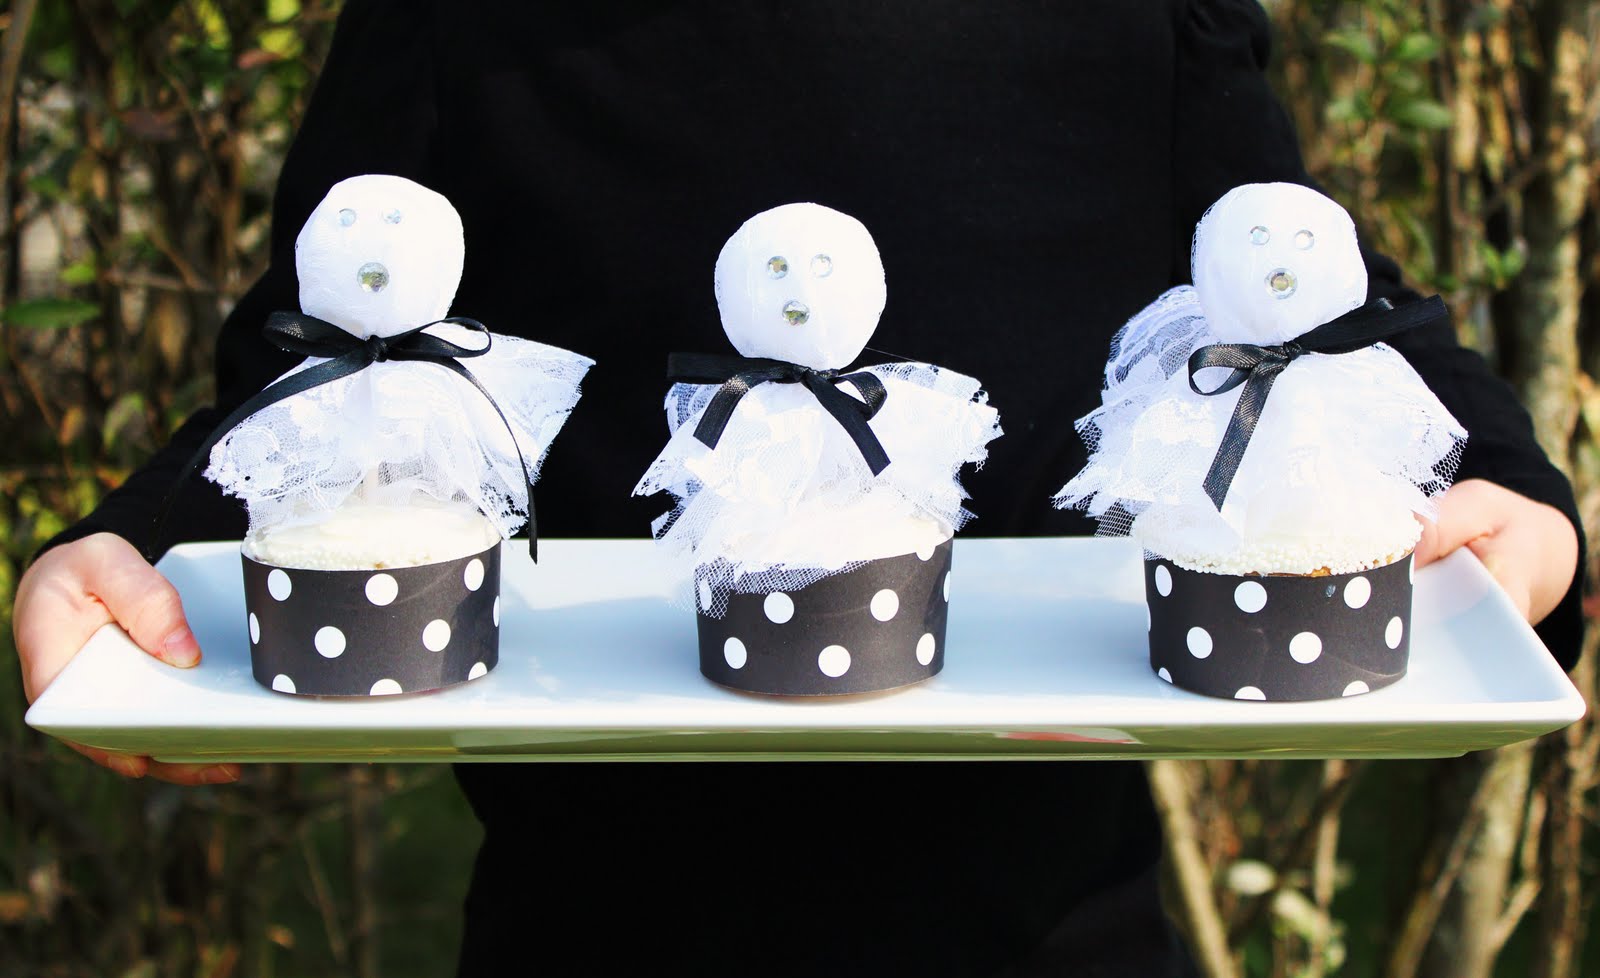
Can you believe Halloween is only one week away...where did October go!?! Well, we thought we would share one more Halloween inspired DIY project with you. These little ghosts will add a "spooky" touch to your cupcakes! Your little ones will love them and best of all...they are so easy to make its "scary"!

Materials:
small Styrofoam balls
lollipop sticks
4" square of tulle
4" square of lace
thin black ribbon
gems for eyes and mouth
(glue gun and scissors)


Just take your little Styrofoam ball and stick one of your lollipop sticks in it. If you need to add a little dab of glue to secure it you can.
Place your lace square over your tulle square and lay it over top of the Styrofoam ball, tie with your black ribbon. Then you can trim around the lace and tulle to get it to the length desired.
Next just hot glue two small gems for eyes and a larger one for a mouth and your little ghost is complete! How easy is that!?!


Materials:
small Styrofoam balls
lollipop sticks
4" square of tulle
4" square of lace
thin black ribbon
gems for eyes and mouth
(glue gun and scissors)
Just take your little Styrofoam ball and stick one of your lollipop sticks in it. If you need to add a little dab of glue to secure it you can.
DIY Tissue Paper Flower Cupcake Picks
Hope you all had a great weekend! We are excited to share another fabulous DIY project from our sweet corespondent Katie! We just love these tissue paper flower cupcake picks, they are so pretty and dainty and can be made in any color combination. We also love that they can be clustered on a cake or placed individually on cupcakes for a beautiful, festive presentation!
Materials Needed:
Materials:
Tissue paper, any color you wish
Scissors
Flat top wooden picks
Hot glue gun/glue
1/8" wide ribbon
Layer 6-8 sheets of tissue paper
Cut out a 2x2 inch square
Fold the squares into quarters
Hold the folded tissue at the folded point
Starting on one side, cut around to make a petal shape, being careful not to cut too close to the point. You can make your petals pointed, rounded, or any shape you wish!
"Sparkle"
Well, now that you are all acquainted with our sweet Katie, we are ready to share her first DIY project with you! While we are not a printable company, when Katie came up with this project, we just had to make an exception! With the 4th of July right around the corner, we just love these "sparkle" cupcake picks, they are perfect for any patriotic celebration!


All you will need is:
white cardstock
printable stars
scissors
wooden tooth picks
hot glue gun/glue
red and white baker's twine or ribbon of your choice
glitter (optional, but always recommended)Super easy directions:
download our printable "sparkle" stars here
print on white cardstock
cut out stars
outline the blue of the stars with glue and glitter if you please
add a drop of hot glue to the back of the star, place pick in glue, and let dry completely
tie baker's twine or ribbon to the pick
stick the stars in your favorite 4th of July treat and enjoy!
Subscribe to:
Posts (Atom)