Pretty Surprise Birthday Brunch

We love the idea of a brunch party, it has to be one of the best ways to share a meal with friends. So when one of our sweet readers, Seri, shared some photos of a beautiful 40th surprise birthday brunch that she created for a client of hers, we just had to share it with you. The brunch took place this past spring and Seri was inspired by the green leaves that were sprouting and the fragrant lilacs that were taking bloom. She created a crowd pleasing spread of delicious foods including french toast bites (inspired by hostess with the mostess), bacon skewers, mini frittatas, lemonade in mason jars, cake pops made from Kreated by Kristan and other brunch inspired dishes. Now that looks like a brunch we would have loved to sample some food from! Check out Seri's blog at little miss party planner!


photos by Scott Clark

"Who We Are" Whipperberry Feature

We recently were asked by some of our favorite blogging buddies, from Whipperberry, to complete a "Who I Am" interview for thier blog. We were really excited to participate in this and it really gave us a chance to think about who we were as partners in "Icing Designs". We thought it would be fun to share with you today, to give you a little insight to who we are and what inspires us!

Who We Are...
1.we are mothers and wives
2.we are faithful
3.we are creative, artistic and inspired
4.we are dreaming of one day having a shop of our own
5.we are lovers of all things vintage and French
6.we love the romance of ruffles, ribbon and lace
7.we love cooking, baking and most of all eating
8.we love outdoor markets and organic foods
9.we think a beautifully decorated cake is truly a piece of art
10.we are trusting, honest life long friends that grow together each day

The simplicity of a soft romantic color palette that dances through a wedding…the feeling of awe we get when we look at the elegance and grace of an
Elizabeth Messina photo…a beautifully decorated shop window that turns your glance into a longing stare…that we get lost in a French confectionary dream world when we see lovely pastries or cakes that are so artfully created…..inspire us! We are inspired by the ordinary turned into the extraordinary and the women who make that happen.


images via: carol hannah, emmalinebride.com, call-me-cupcake.blogspot.com, stylemepretty.com, elizabeth messina, emily blunt for vogue.com, kellie kano and elissa keno for the inspired creations contest on elizabeth anne designs, stylemepretty.com, call-me-cupcake.blogspot.com, pinterest

Rainbow Week: New Rainbow Products and Party

Well as we come to then end of our Rainbow week, we would love to share some new products that we are offering in our shop and the party that Katie (our friend and DIY correspondent) did for her daughter Siena. Katie created the coolest cloud and tulle rainbow to hang above her dessert table. She used an old lamp shade and covered it with a white sheet, gluing it in various spots so it looked puffy and then attached tulle in rainbow colors that flowed down over the table! We love the table cloth she used, which was actually a white textured blanket from Ikea. Across the table she hung one of our new "rainbow garlands"! We made a little white ruffle cake with rainbow sprinkles and matching cupcakes for the center of her table and Katie used our new "rainbow oversized cupcake topper" to stick in the top! She set up a little "rainbow" candy shoppe on the side of the table in various sized apothecary jars with all different colored candies for the little ones to take home with them. She also made the cutest mini cupcakes with rainbow colored pom poms on top and white chocolate popcorn "clouds"! Of course all of the little ones got a rainbow and cloud wand and a rainbow princess crown to take home too! We think Katie did a great job setting up sweet Siena's 4th birthday party...thanks so much Katie for letting us share it!


Rainbow Week: DIY Rainbow Princess Crowns

To continue with our rainbow week...we are excited to share with you the cutest DIY princess crowns! When Siena told Katie she wanted a "Rainbow Princess" birthday party, she thought all of her little friends needed rainbow crowns to wear! You can leave these plain, or have the kids decorate them with jewels for a fun party craft!

Materials:
Scissors
X-acto Knife (you can use scissors if you don't have one of these)
White sticky back felt
Red, orange, yellow, green, blue and purple, felt (or any colors you choose for your rainbow!)
Ribbon

Download and print crown template here and cut it out
Trace crown on the back of the sticky back felt and cut it out


Place pattern on the top of the piece of felt and cut out a rectangle to the appropriate size, leaving a little overlap on the top. Repeat this for each color. You can put the colors in any order you wish.

Peel the backing off of the sticky felt and place each piece of colored felt on top. Be sure to line up the bottom edge and fit colors as close together as possible. Turn your crown over and trim the colored felt along the edges of the crown.
Turn your crown over and trim the colored felt along the edges of the crown.
Using an X-acto knife (or scissors) cut a small slit on each side of the crown.
Cut two pieces of ribbon about 18" each. You can adjust length of ribbon depending on the child's head size, but leave plenty of extra to tie in a bow. Thread ribbon through the slits and tie in a knot.
Find a little princess to wear the crown!


Rainbow Week: DIY Rainbow Wands

This week we are celebrating all things rainbow! We have had a lot of rainbow requests lately, so we thought it would be fun to share some DIY inspiration for your next rainbow party! Our friend and DIY corespondent, Katie had a super sweet rainbow princess party for her little Siena's 4th birthday party this past weekend! We thought it would be great to share some of the DIY projects she created for the party! We love these cloud and rainbow wands she made for all of the little girls to take home! Material:
Scissors
Hot glue gun/glue (if you would like a more finished edge, you could sew around the cloud edges instead of using hot glue)
Glittered white felt (plain white would do just fine too)
Stuffing
Extra long lollipop sticks
1/4" red, orange, yellow, green, blue and purple ribbon cut to about twice the length of your lollipop stick
Place two pieces of felt together (If you are using glittered felt, place wrong sides together). Draw a cloud shape onto the felt and cut it out.
Put a thin line of hot glue just along the edge of one cloud piece, leaving a 2 inch opening at the bottom. Place the other cloud piece on top and stick together. After the glue is dry, fill the cloud with stuffing.
Gather your ribbon pieces together and tie them in a knot around the top of your lollipop stick.
Place a dab of hot glue on the knot and stick it inside your cloud. Close up the bottom of your cloud with a little more hot glue and you are finished!


"B" is for Boy Baby Shower

This past spring we were asked to create a shower for a Baby Boy-to-be. We love to coordinate the shower with the baby’s nursery so this shower was styled to coordinate with Pottery Barn Kids ‘Junior Varsity’ nursery set and we created a ‘B is for Boy’ baby shower.
To set the tone for the shower we created custom invitations with a Pendant Monogram with colors of champagne, red and navy.

The momma-to-be LOVES paper poms and all things vintage…so we hung poms over the sweet bar in rich colors of red, champagne, navy and chocolate brown! The sweets were placed on silver pedestals to set a vintage feel. For the sweets we made chocolate dipped strawberries, chocolate dipped rice krispy treats, Italian sugar cookies, vanilla and chocolate cupcakes with super cute Monogram Pedant Cupcake Flags placed in them. We also had an apothecary jar filled with milk duds and the other filled with chocolate covered pretzels…LOTS OF CHOCOLATE! Additional decorations were placed over the fireplace; chocolate brown poms, red honey combs, a large letter ‘B’, and a ‘B is for Boy’ letter garland (how do you like to new garland shape … TRIANGLES!!).


The beautiful Momma was beyond happy with her shower. Congratulations Jacquie and Scott…we can’t wait to meet your new baby boy!


Invitations & paper party goods:
Icing Designs
Paper Poms: Prost to the Host
Honey Combs: Partypro.com
Yarn Covered letter B: tutorial

Baby Lifestyles Magazine Feature

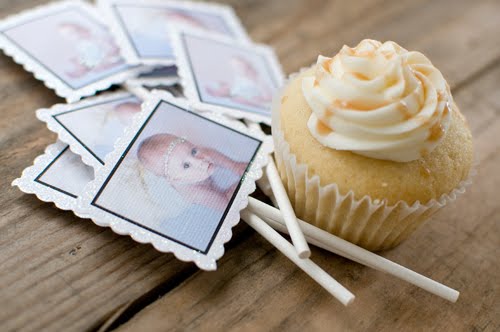
We are so excited to have had our frosted photo cupcake flags featured in the latest issue of “Baby Lifestyles” (page 11)! They are definitely one of our biggest sellers and one of our favorite items to create! Each one is so unique and special. We recently had the pleasure of making some of the sweetest frosted photo cupcake flags with photos of our lovely and talented friend, Meg Fish’s darling little girl Ella. Meg photographed the flags for us with delicious cupcakes from Enjoy Cupcakes! (We hope you got to read our interview with Amber last year...she is just the sweetest!) We are so thrilled to have those photos featured, and so blessed to be able to work with such amazingly talented and kind women like Meg and Amber!


Blogging tips